There's a unique satisfaction that comes with having portable power at your fingertips – whether you're powering tools at a remote job site, keeping your home humming during an outage, or enhancing your outdoor adventures. Your Ryobi inverter generator, models like the RYi2022GRA or RYi2022VNM, is a fantastic piece of equipment designed to make these scenarios possible. But like any valuable tool, getting the most out of it and ensuring it lasts requires more than just filling it with gas and pulling a cord. It demands a thoughtful approach to operation and diligent maintenance.
This guide isn't just about reading a manual; it's about understanding the "why" behind the "how-to." We’ll walk through everything from initial setup and safe operation to essential upkeep and troubleshooting, making sure you feel confident and capable every step of the way. Let's make sure your Ryobi inverter generator serves you reliably for years to come.
At a Glance: Key Takeaways for Your Ryobi Generator
- Fuel Smart: Use unleaded gasoline (86+ octane, up to 10% ethanol). Never use E15 or E85.
- Oil Right: Use SAE 10W-30 (API SJ+). Check oil level before every use.
- Safety First: Operate outdoors only, at least 20 feet from occupied structures, with exhaust pointed away. Maintain 3 feet clearance from combustibles. Always use a CO alarm.
- Start Easy: Connect no loads before starting. Plug in largest load first, then smaller ones.
- Maintain Regularly: Clean air filter, change oil every 100 hours/6 months, inspect spark plug, and clean the spark arrestor.
- Store Smart: Follow specific fuel draining procedures based on storage duration. Always store on its feet.
- Warranty Watch: Neglecting maintenance can void your 3-year limited (personal use) or 90-day (commercial use) warranty.
Unlocking Portable Power: Getting Started with Your Ryobi Generator
Your Ryobi inverter generator is engineered to provide clean, stable electricity for sensitive electronics, appliances, and tools. But before you plug in your first device, there are a few critical steps to ensure safe and efficient operation.
Grounding Rules: Your Safety Net
Most of the time, if you're just using your generator to power cord-and-plug connected equipment (think drills, lights, or small appliances), the National Electric Code (NEC) doesn't require separate grounding. Your equipment's three-prong plug often handles this.
However, some applications do require additional grounding to minimize shock risk. If you’re unsure, it’s always best to consult a qualified electrician or your local building codes agency. When grounding is necessary, you'll need to connect a #8 size wire to your generator's ground terminal. This wire then attaches to a suitable ground source, such as a steel or iron rod at least 5/8 inches in diameter, or a nonferrous rod at least 1/2 inch in diameter, driven into the soil for a minimum of 8 feet. Remember, any electrical tools or appliances connected to your generator must also be properly grounded, utilizing 3-prong grounded plugs and outdoor-rated extension cords with 3-pole receptacles.
Fueling Up Right: The Lifeblood of Your Generator
The type of fuel you use is crucial for your Ryobi's performance and longevity. Stick with unleaded gasoline that has a pump octane rating of 86 or higher and contains up to 10% ethanol.
A critical warning: Never use E15 or E85 fuel. Using these higher-ethanol blends not only violates federal law but will also cause significant damage to your unit and immediately void your warranty. The fuel tank capacity is a convenient 1.2 gallons. When filling, aim to leave about 1 inch of space below the top of the fuel neck to allow for expansion and prevent spills. Always fill up in a well-ventilated area, away from any ignition sources, and allow at least 30 minutes for the generator to cool down before refueling.
Lubrication Matters: Keeping the Engine Humming
Just like the fuel, the right engine lubricant is vital. For your Ryobi inverter generator, use SAE 10W-30 4-stroke motor lubricant with an API service classification of SJ or higher. The engine typically requires approximately 12 ounces of lubricant.
Your generator features a smart low oil sensor. If the lubricant level is insufficient, this sensor will prevent the engine from starting or shut it off mid-operation to protect it from damage. This is a lifesaver, but it’s no substitute for your vigilance. Make it a habit to check the lubricant level before every operation. It's a quick check that can save you a big headache down the road.
Your Generator's Happy Place: Siting for Success
Where you place your generator during operation is just as important as how you fuel it. Your Ryobi inverter generator is an outdoor machine, period. It must be operated outdoors in a well-ventilated, well-lit area.
Position it on a flat, stable surface with a slope of no more than 4 degrees – this ensures proper oil circulation and stable operation. Crucially, maintain a minimum clearance of 3 feet on all sides, including overhead, from any combustible materials. This applies during both operation and storage. For optimal performance, your generator prefers temperatures between 23°F and 104°F with relative humidity of 90% or less. Respecting these environmental guidelines helps your generator perform efficiently and safely.
The Silent Killer: Carbon Monoxide Safety First
This is perhaps the most critical safety message. Never operate your generator indoors, in garages, crawlspaces, sheds, or any other partly enclosed areas. Carbon monoxide (CO), a colorless, odorless gas produced by running generators, can build up to deadly levels in minutes.
Always locate your generator at least 20 feet away from open windows, doors, and vents of any occupied structure, ensuring the exhaust is pointed away from them. For an added layer of protection, use a battery-powered or battery-backup CO alarm inside your home. Your Ryobi generator is equipped with a sophisticated CO sensor that will flash red and automatically shut off the unit if dangerous CO levels are detected. If this happens, do not hesitate: immediately leave the area, relocate your generator to a truly open outdoor space, and ventilate the previous area thoroughly before re-entry. And whatever you do, never tamper with the CO sensor module. It's there to save lives.
Master Your Ryobi: Operating with Confidence
Once your generator is safely positioned and properly fueled and oiled, you're ready to harness its power. Understanding its features and the correct startup sequence will ensure a smooth experience.
Anatomy of Power: Key Controls & Features
Your Ryobi inverter generator comes with several intuitive controls and features designed for ease of use and safety:
- Easy Start Dial: This multi-function dial simplifies operation, handling engine start, stop, run, choke settings, and the fuel valve all in one place.
- Auto Idle Switch: Engage this to optimize fuel consumption. When activated, the engine speed automatically adjusts based on the electrical load, saving fuel and reducing noise.
- Automatic Shutoff: A critical safety feature, this activates if the CO sensor detects unsafe levels (flashing red LED) or if the lubricant level drops too low.
- Reset Button: If your generator becomes overloaded, the power will cut out. After removing the last electrical load, simply press this button to restore power.
- LED Display: This handy indicator will light up to signal when your generator is overloaded, prompting you to reduce the connected load.
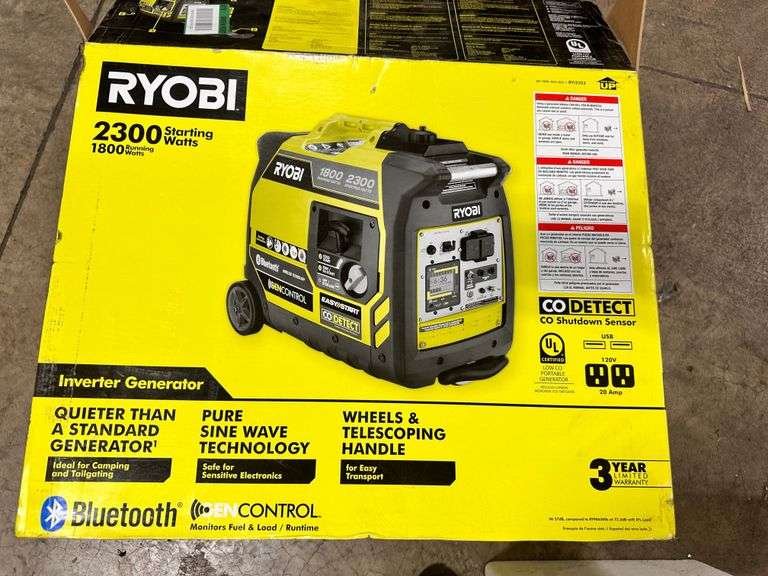
- 120 V AC Receptacles: You’ll find two single-phase, 60 Hz, 20 Amp outlets to plug in your devices.
- Parallel Kit Terminals: For those needing extra power, these terminals allow you to link your Ryobi with another compatible generator (using a kit sold separately) to increase your total output. Important: Never connect or disconnect these cables while either generator is running.
- ANSI/UL-2201 Certified: This certification means your generator complies with stringent standards for low carbon monoxide emission rates and is equipped with a reliable CO shutoff feature.
The Power-Up Sequence: Starting Your Generator
Starting your Ryobi is straightforward when you follow these steps:
- No Loads First: Ensure no electrical loads are plugged into the generator.
- Easy Start Dial: Rotate the Easy Start dial to the 'Start' or 'Choke' position as indicated, depending on whether the engine is cold or warm.
- Recoil Starter: Firmly pull the recoil starter handle until the engine kicks to life.
- Run Position: Once the engine is running smoothly, rotate the Easy Start dial to the 'Run' position.
- Engage Auto Idle (Optional): If you wish to save fuel and reduce noise, flip the Auto Idle switch to the 'ON' position.
Managing Your Loads: Powering Devices Smartly
Connecting devices correctly ensures stable power and prevents overloading.
- Start with No Loads: As mentioned, always start the generator with nothing plugged in.
- Plug in the Largest Load: Once the generator is running and stable, plug in and turn on the device with the highest wattage requirement first.
- Allow Stabilization: Give the generator a moment to stabilize its output under this load.
- Add Smaller Loads: Next, plug in and turn on the device with the next highest wattage.
- Repeat and Monitor: Continue this process for any additional loads, always allowing the generator to stabilize between connections. Crucially, never exceed the generator's continuous or surge wattage capacity. Your Ryobi provides 1,650 rated watts and 2,050 starting watts. Overloading will cause the generator to trip the reset button or shut down.
Understanding Electrical Specs: What Your Ryobi Can Do
Your Ryobi inverter generator delivers 120V AC rated voltage, 13.75A AC rated amps, 1,650 W rated output, and 2,050 W starting watts, all at a rated frequency of 60 Hz. This stable, clean power is ideal for a wide range of devices.
For sensitive electronics, it's important that your equipment can tolerate a voltage variation of +/- 10% and a frequency variation of +/- 3 Hz from the generator's nameplate ratings. Most modern electronics are designed to handle these minor fluctuations, but always check your device specifications if you have concerns. Connecting incompatible equipment could potentially lead to damage.
Efficiency on Demand: The Auto Idle Advantage
The Auto Idle switch is one of the standout features of inverter generators, and your Ryobi is no exception. When engaged, this intelligent system automatically adjusts the engine speed to match the electrical load currently being drawn.
Think of it this way: if you're only powering a few lights, the engine will slow down, consuming less fuel and operating more quietly. If you then plug in a power tool or a small appliance, the engine will rev up to provide the necessary power, then slow back down when the demand drops. This not only significantly improves fuel efficiency, extending your run time, but also reduces wear and tear on the engine and minimizes noise pollution. It’s a win-win for both your wallet and your ears.
Parallel Power: Doubling Your Output
Sometimes, 1,650 continuous watts just isn't quite enough. That's where the parallel kit terminals come in handy. These allow you to connect two compatible Ryobi inverter generators together, effectively doubling your available power output. This is perfect for larger RVs, more demanding job sites, or if you need to power a wider array of household appliances during an extended outage.
Remember, the parallel kit is sold separately, and you must strictly follow the instructions provided with it. As a general rule of thumb and a critical safety measure: never connect or disconnect parallel cables while either generator is running. Always shut down both units, connect the cables securely, and then restart them. This prevents dangerous electrical arcing and protects both your generators and yourself. For those interested in expanding their portable power solutions, you can Explore Ryobi Inverter Generators and see the full range of options, including parallel-capable models.
The Long Haul: Essential Maintenance for Longevity
Proper maintenance isn't just about keeping your generator running; it's about protecting a significant investment and ensuring it's ready when you need it most. Neglecting routine care can lead to costly repairs, diminished performance, and even void your warranty.
Why Maintenance Isn't Optional: Protecting Your Investment
Imagine a car that never gets an oil change, or an air conditioner with a clogged filter. They might run for a while, but they'll perform poorly, consume more fuel, and ultimately fail prematurely. Your Ryobi inverter generator is no different. Regular maintenance ensures efficient operation, maximizes its lifespan, and safeguards your warranty. It's truly an ounce of prevention worth a pound of cure.
Your Maintenance Checklist: Keeping it Running Smoothly
For optimal performance, follow this maintenance schedule (and more frequently if you operate in dusty or harsh environments):
- Air Filter: A clean air filter is essential for efficient combustion. Every 50 hours or annually (or more often in dusty conditions), remove the air filter and clean it with warm, soapy water. Rinse thoroughly, let it air dry completely, and then reassemble. A dirty filter can choke your engine, leading to reduced power and increased fuel consumption.
- Engine Lubricant: This is one of the most vital maintenance tasks. Change your engine lubricant every 100 hours of operation or every 6 months, whichever comes first. To do this, run the generator for a few minutes to warm up the oil (but not make it scalding hot), which allows it to drain more completely. Then, remove the oil drain plug, allow all the old oil to drain into a suitable container, and refill with approximately 12 ounces of fresh SAE 10W-30 (API SJ or higher) 4-stroke motor lubricant. Proper disposal of used oil is important for environmental protection.
- Spark Plug (NGK BPR7HS or equivalent): The spark plug is responsible for igniting the fuel-air mixture. Inspect it every 100 hours or annually. Remove the plug, check for signs of wear, carbon buildup, or damage. Clean any deposits with a wire brush, and then check the gap using a feeler gauge. The correct gap for your Ryobi is 0.024–0.028 inches (0.60-0.70 mm). Adjust if necessary, or replace the plug entirely if it's damaged or heavily worn. A healthy spark plug ensures easy starting and efficient engine operation.
- Spark Arrestor: Located in the muffler, the spark arrestor prevents hot sparks from escaping the exhaust, which is crucial for preventing fires, especially in dry environments. This component should be cleaned or replaced every 50 hours of operation or yearly. Refer to your owner's manual for specific instructions on how to access and clean or replace it, as it typically involves removing a few screws to access the screen. A clogged spark arrestor can reduce engine power and efficiency.
Seasonal Prep: Storing Your Generator Safely
Proper storage is critical to prevent issues like stale fuel and corrosion, ensuring your generator starts reliably after extended periods of inactivity. Always store your generator standing on its feet; never store it on its side or vertically, as this can lead to fuel or oil leakage.
- Less than 2 months of storage: Simply drain all gasoline from the fuel tank. Running the generator until it runs out of fuel can help clear the carburetor, but draining the tank is the primary step.
- 2 months to 1 year of storage: Beyond just draining the fuel tank, you’ll also need to drain fuel from the carburetor. This often involves locating a drain screw on the carburetor bowl and allowing the fuel to flow into a safe container. This prevents fuel from turning stale and gumming up internal components.
- 1 year or more of storage: This is comprehensive long-term storage.
- Drain fuel from the carburetor first, then drain the fuel tank completely.
- Remove the spark plug.
- Add one tablespoon of engine lubricant (SAE 10W-30) directly into the spark plug cylinder.
- Slowly turn the engine a few times using the pull rope (with the spark plug still out) to distribute the lubricant and coat the cylinder walls, preventing rust.
- Reinstall the spark plug.
- Finally, change the engine lubricant as per the regular maintenance schedule.
- After removal from storage: Always fill with fresh gasoline. If you plan to store gasoline itself for future use (e.g., in a separate jerry can), ensure it has been treated with a fuel stabilizer to keep it fresh for longer.
Traveling with Your Ryobi: Safe Transport Tips
Whether you're moving your generator to a different spot on your property or taking it on a road trip, proper transport is essential for safety and to prevent damage.
Before moving the unit, ensure the Easy Start dial is in the OFF/STORAGE position. Allow the engine and exhaust to cool down completely, which can take at least 30 minutes, especially after heavy use. Always keep the unit level to prevent any accidental fuel spillage.
When transporting your Ryobi in a vehicle, take extra precautions:
- Drain the Fuel: Completely drain the fuel tank. This is the most crucial step to prevent spills and fire hazards.
- OFF/STORAGE: Confirm the Easy Start dial is set to the OFF/STORAGE position.
- Secure It: Place the generator in a stable position and securely restrain it to prevent it from moving or tipping during transit.
- Protect Against Drips: Even with the fuel drained, a plastic sheet or absorbent pad placed underneath the generator can catch any residual drips or oil leaks, protecting your vehicle's interior.
Troubleshooting Common Hiccups: When Things Go Wrong
Even with diligent maintenance, issues can sometimes arise. Knowing how to quickly diagnose and address common problems can save you time and frustration.
Engine Won't Start? Your Quick Fix Guide
This is a common frustration, but often has a simple solution:
- Easy Start Dial: Is it set to the correct START/CHOKE position?
- Fuel Level & Freshness: Is there enough gasoline? Is it fresh? Stale fuel (older than 30 days without stabilizer) is a common culprit.
- Lubricant Level: Check the oil. The low oil sensor will prevent starting if the level is insufficient.
- Spark Plug: Is it dirty, fouled, or improperly gapped? A faulty spark plug can easily prevent ignition.
- CO Sensor Status: Check the CO sensor LED.
- A flashing red LED indicates high CO levels, meaning the unit has shut off for safety. Relocate the generator immediately.
- A flashing yellow LED or a chirp indicates a CO sensor fault. While it might still operate, you should address this.
Hard to Start or Lacks Power?
If your generator struggles to get going or seems to be running but lacks its usual oomph:
- Water in Gasoline: Condensation can introduce water into the fuel, especially if it's been sitting. Try draining the tank and refilling with fresh gasoline.
- Weak Spark Plug: A worn or dirty spark plug might still produce a spark, but it could be too weak for efficient combustion. Inspect and replace if needed.
- Dirty Air Filter: As noted in maintenance, a clogged air filter starves the engine of air, leading to poor performance. Clean it.
- Fuel/Carburetor Issues: Stale fuel can gum up the carburetor, impeding proper fuel flow. If other checks fail, a carburetor cleaning might be necessary, potentially by a qualified technician.
AC Receptacle Does Not Work?
You've got the engine running, but nothing is happening when you plug something in:
- Defective Item: First, test the plugged-in item in a known working outlet to ensure it's not the problem.
- Overload: Is the generator overloaded? The LED display will indicate this. Unplug the last electrical load you connected and then press the Reset Button to restore power. Remember your generator's 1,650 W rated output and 2,050 W starting watts.
Beyond the Basics: Warranty & Staying Prepared
Understanding your generator's warranty and adopting a mindset of readiness will maximize your investment.
Protecting Your Warranty: Know the Terms
Your Ryobi inverter generator comes with a solid Three-year Limited Warranty for personal, family, or household use. For those using it in a business or commercial setting, there's a 90-day warranty. This warranty is a testament to Ryobi's confidence in their product.
However, a crucial point to remember is that neglecting required maintenance may void your warranty. This isn't just about manufacturer policy; it's about common sense. Manufacturers expect their products to be cared for according to their guidelines. By sticking to the maintenance schedule outlined above, you're not only extending the life of your generator but also ensuring your warranty remains valid should a manufacturing defect arise. Always keep records of your maintenance activities, such as dates of oil changes or filter cleanings.
Staying Prepared: Final Thoughts on Generator Readiness
An inverter generator like your Ryobi isn't just a tool; it's a critical piece of equipment for peace of mind, productivity, and enjoyment. Whether it's for emergency power, powering remote projects, or enhancing your camping experience, proper operation and maintenance are paramount.
Make a habit of periodically reviewing your owner's manual, even after you've read it once. Keep a small toolkit handy with a spark plug wrench, feeler gauge, and screwdrivers for basic maintenance. Store extra oil, a spare spark plug, and a small amount of fresh, stabilized fuel where you store your generator.
By following these guidelines, you're not just maintaining a machine; you're cultivating a reliable partner that will deliver power when and where you need it most. Stay safe, stay powered, and enjoy the capabilities your Ryobi inverter generator brings.